I was lucky enough, when living in Houston, to buy a 1982 Bianchi Nouvo Racing in reasonable condition for not a silly amount. I had always wanted a nice vintage bike and whist the frame is really too large, I could not let the opportunity go. I don’t think in its 40+ years the bike has been ridden a great deal. It is a USA edition and they offered some different colours to those in Europe. Hence it is not in the classic Bianchi Celeste, some thing which initially I was “upset” about but to be honest as time has passed I am actually happy with it being non-standard. I has this weird anthracite with good fleck metallic pain which I now love. See below:
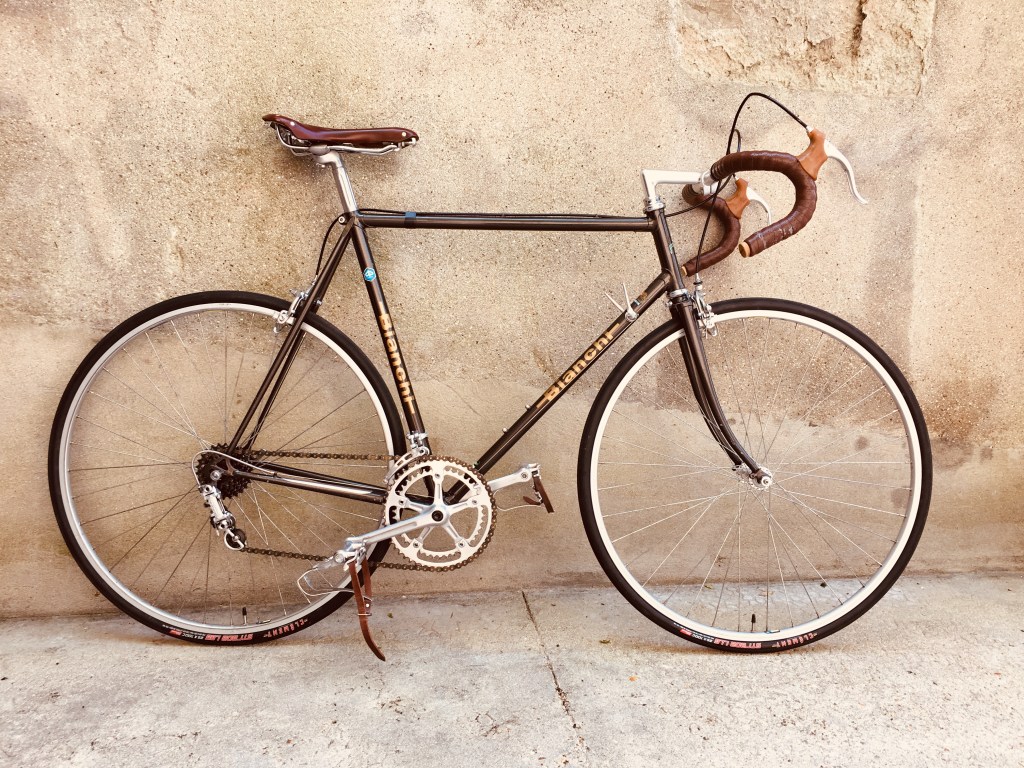
The picture is after I had done a pretty much complete rebuild. Everything was pulled apart excepting the freewheel hub, which I did not have the tools to do. Non standard now is the saddle (Brookes Swallow, Chorus D Toeclip straps (they were white!!! And dirty – we don’t do dirty)and the horrible cork bar end plugs (they will go). One of the top tube cable retainers had been broken off and above I was using tape. Now I have a small stainless steel brake cable clamp that looks fine. Oh yes, the brake lever rubber boots were the closest I could find online as the others had rotted away. It really does look amazing and has gotten some comments on the short rides I have taken it on. Short rides… short?
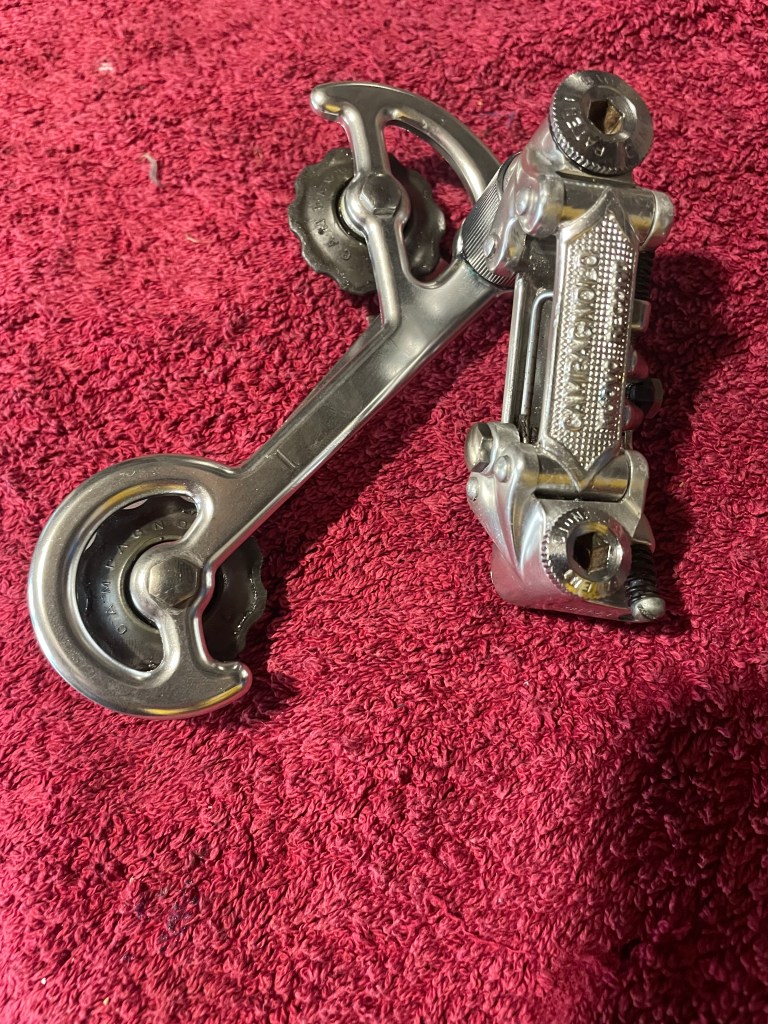
So here comes the kicker… the folks who rode these bike were made of STRONG stuff. Not like us wimps with our carbon fiber 6.8kg Di2 sub compact machines. OK the bike isn’t heavy but the brake hood position makes for an interesting ride but even more so the gear ratio. This comes down to the ratio between the front chain ring and the rear one. Climbing is perhaps where this is most important and nowadays it’s not unusual to have a 32 on the back and with a subcompact a 50/34 upfront. So when in the small ring up front and 32 at back you are basically at 0.94 ratio – for every crank turn the wheel will turn 0.94 times. When descending likely you’ll be in 50 upfront and maybe 12 at the back… meaning one crank turn means over four wheel revolutions. But let’s get back to climbing as that’s the tough stuff (but a necessity – even poor climbers (85kg excuse comes out here) would hate only flat rides all the time). I’ll be honest even with a 0.94 ratio it can hurt on long climbs…So let’s go back to the Bianchi and the simple mettle of the riders of the time. Up front we have 42/52. At the back with my Atom 77 freewheel (at some stage perhaps I’ll go into freewheels vs free hubs) I have a max 22. So my best climbing gear on the Bianchi is 1.52. Damn those folks 40 years ago could grind!!!! The Nuovo Racing deserves to be ridden more but not if it is going to kill my arthritic knees. Today we can swap cassettes and more, but try doing that with a bike 40 years old. This is project Bianchi – to get a reasonable gear ratio and stay age compliant. My first attempt will be a Atom 77 6 speed freewheel with a max 26 tooth. This is the max size for the Nuovo Record Derailleur, that will not be changed. The Nuovo Record was a bit of the turning point for rear derailleurs. Whist not the smoothest in gear changes it was perhaps on of the first reliable and robust rear derailleurs and has to stay. I have heard with increased chain tension (i.e. take some links out) you can perhaps get away with a 28… but I am not going to risk that. Anyone who’s changed Ultegra above a 32 will know about getting a long cage derailleur. The long cage gives you the extra throw/room to go to 34 or more. If you are a bike nerd in development then learn more here. Well, after lots of research I found out that a small US based firm, years ago, made a Nuovo Record long cage and even better I have it on order now… as well as a Atom 77 6 Speed 14-32 freewheel. That means, staying period appropriate, I’ll be with a 42/32 ration – basically 1.3. Yes not a “soft” as modern options but definitely better on the climbing front. As I go through the upgrades I’ll post how they work! The site is starting to get a bit of a vintage bike feel.. So I’ll have to do something with some newer tech soon too!
Project Bianchi – deuxième partie – Nous Avons Un Problem
The great thing about these projects are that they are a learning experience. The parts all arrived at the same time (!) and so I decided go big or go home. Before any modifications were to be made however I thought it would be a good idea to set a baseline to see what the difference would be. It’s still cold near Paris and the club ride was delayed to the afternoon today so we could (A) recover from hangovers (B) get a whole extra 3 degrees C increase in temp. So I decided to take the Bianchi on a test ride for which I thought the “Col St Germain” would be perfect. It’s about 3km to get to this small climb and the details from Strava are below. 1 km long, 5% with 62m of climbing. We watched the Olympic mens race head up it earlier this year and it is a special little bit of road. A cycle lane has been built on either side which is perfect for the climb. Descending is another story as basically the 50 km/h speed limit is easily surpassed and staying on the road is safer (no damp leaves in Autumn etc) although rarely a car can get “funny” that your not on the “piste velo” – even when you’re at 50 km/h+. Weird as I didn’t think there were Daily Mail readers here in France.

Crossing the Le Peq bridge I was ready to get climbing. I was expecting to feel the grind once I was in the 42 at the front and the 22 on the back but surprisingly it was not so bad. There was however a bigger issue! The position of the derailleur is basically held by the tightness of the adjustment screw on the downshifter. If not enough there can be a tendency for the derailleur to downshift which created a unique issue on the bike. I found the chain could move slowly into a position where it was riding between the gears and slipping over the teeth which could only be remedied with a quick shifter adjustment. It really brings home how spoilt we are today with shifters on the brake hoods and no having to reach down, between your legs to do any shifting which is not the best experience when climbing and worried you are about to spin out. I got used to it and had to adjust every 50-100m which no doubt sapped time. However the harsh gear ratio did start to pay a little toll near the top – nothing severe but enough to say this would not be fun on the likes of the Galibier. So how did I do? Back to Strava!
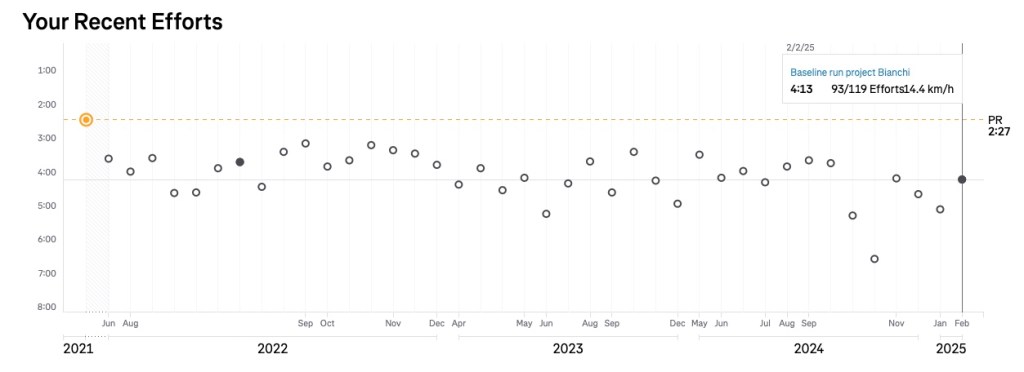
As you can see my time was not too bad compared to all my prior efforts. Indeed one would say average for me and so the gearing was not a huge impact but I know for sure on longer climbs that would not be the case. Have we become too used to 1:1 gearing at the extreme, reducing leg strength? I am not a great (or even mediocre) climber. However would training in a harder gear help with strength? I think so.
The idea at this stage was to go home and build on the 14-32 but the issue with slipping between gears was too much and needs to be sorted first. Research time! I had bought a new GOLD chain for the bike and it looks fantastic. I have never had one before but it goes with the Bianchi decals so well! (Confession – on the Canyon Endurace I have a oilslick/galaxy/unicorn blood colour (all definitions from the kiddos) chain and have had adequate ribbing from the club due to matching accessories). When I bought it it said 5-6-7-8 compatible and hence with little thought I installed it. But here is the rub – no pun intended…
Nearly all bike chains have a 1/2 inch pitch, which is the distance from the roller to roller on a chain, or a link. Where they vary is the chain width which makes sense. So a 13 speed rear cassette is going to have a narrower space between the gears so they can fit in the frame space and hence the chain will be narrower. However on the whole there isn’t a huge difference between 5-6-7-8 chains widths for the main era they were used – or so I thought. So my bling chain should have been fine except, no… the earlier 6 speeds were indeed wider. The later ones have a chain width of 7.3mm but the early 6 speeds were 7.8mm – a whole extra 0.5mm which means the slimmer chain can ride between gears as shown below:
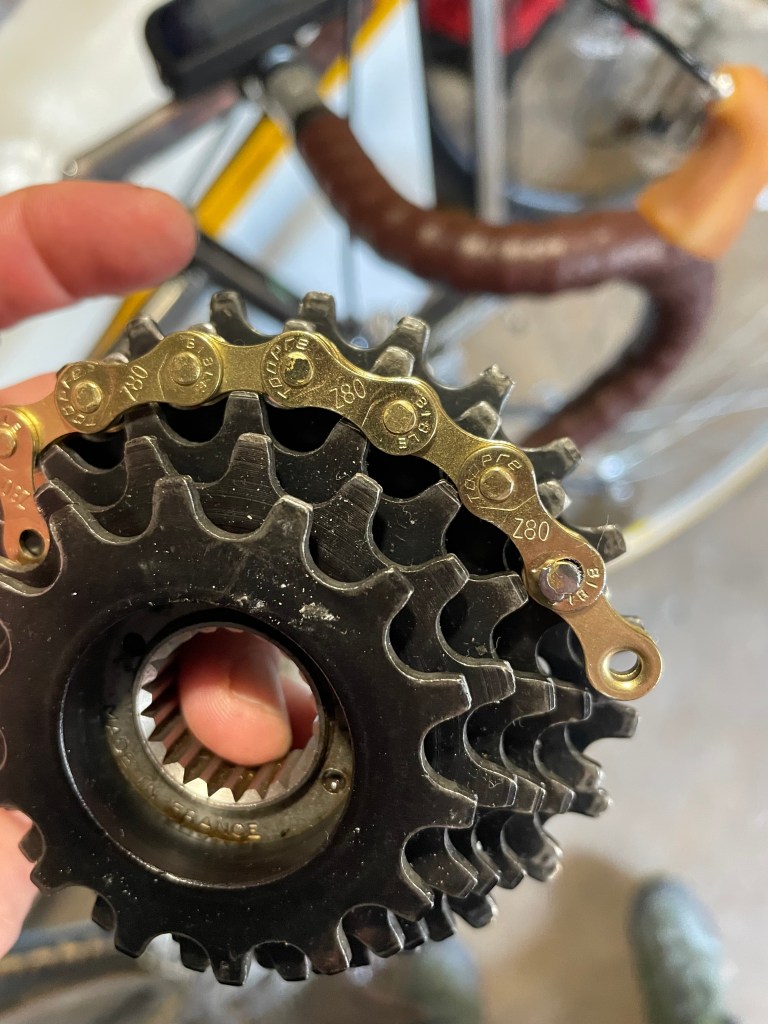
So Project Bianchi needs a new chain! I am struggling to find an old 7.8mm GOLD chain – it has to be gold as I can’t go back now. I mean look at it!

So I’ll need to find the chain – re-ride the baseline test and do the mod. Which is noooo problem as I am learning more and more. If you want to know more about chain compatibility then go here which helped me in all my research.
Finito! Troisième partie
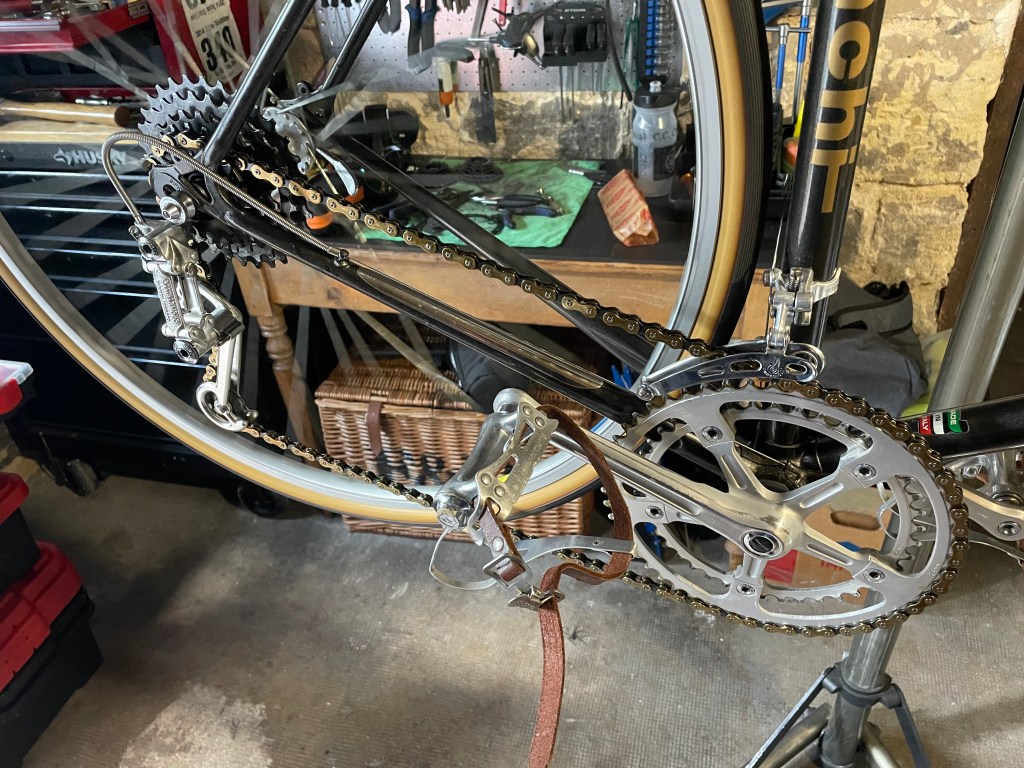
Work has been busy (223 abstracts reveiwed) and with some other things going I have not been able to work on the bike. With all the parts there, after a wonderful ride today, it was time to do the work and hope it was going to be as simple as it “should be”. After all changing a cassette (freehub remember), the derailleur cage and the chain should not be that hard.. then ypu remember this isn’t all exactly new “plug and play” due to its age and then we need to add this is none standard and every thing needs to work in sync – perefectly. What could go wrong. As a reminder here is the old set up and you see some of the shifting issues introduced just by a chain change.
The gold chain does look very bling and works well with the gold decals on the bike (and the tan wall tires) (and the vintage leather trim) (and the new “old” bottle cage and bottle”) but is now the new chain is on, I have come to my senses and realized too much gold is too bling. I did post the finding on a new chain prompted by 50% of my readers telling me to get on with the project (thanks buddy!). Here is a reminder, it its original packing, and this is what made me realise too much gold is too much gold.
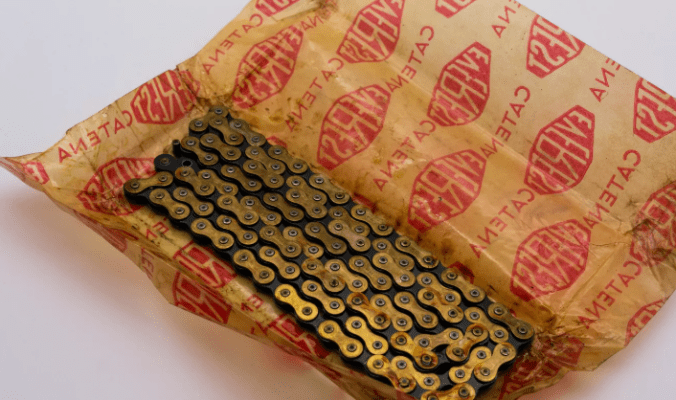
Gold and black – it’s the new black! And works perfectly on this bike, all the more for being Italian. I must give a shout out the the seller on ebay https://www.ebay.fr/str/velograma. I made a mistake on the shipping and Valentin was awesome sorting it out.
There was one worry however… the chain had 116 links and came from an era when long cages and 32 rear cogs did not exist. Would it be long enough? Perhaps a silly worry but logic failed me and post pushing “pay” I decided to check (not the best order, one appreciates). I found this rather useful website https://www.alpinetrek.co.uk/chain-length-calculator/ where you add the chain stay lengh and the number of teeth on each gear to see how many links are required. 116 was plenty so no further stress other than me b*****g up the order and Valentin fixing it over multiple emails. Work did it’s normal thing and post the chain arriving it was another month until I descended into the Cave to do the work. Would it be easy or one of the jobs that just keeps giving (JTJKG)?
First things first, time to remove the small 22 Atom freewheel. I had purchased the necessary Park tool FR-4 sometime ago and must have decided to put it in a special place so I would not loose it. Indeed a place so safe that finding it would almost turn this job already into JTJKG territory. Finally I found it parked in the corner of a special tools drawer and went about removing the freewheel, or rather trying to. With it having been in place for approx 40 years it appeared it did not want to let go and a variety of larger socket extension bars were used until it fainally came free and somehow I managed to avoid my hand crashing into something such as the cog and a hospital trip (yes, that is the voice of experience). I cleaned up the treads and got to use my new grease syringes. I bought these at a local antiques market that occurs twice a year on the Ile des Impressionists. It is basically a huge antique and pork event – and wonderful combo. It is also where Renoir painted Le déjeuner des canotiers. I digress!

These syringes are amazing – easy to fill up new if the grease comes in a toothpaste style thingy (!) which Park HPG-1 does and is a rather dashing blue too. The freewheel was installed on the wheel and it was time to change of the cage on the derailleur. Doing so it became obvious that the Campy had serval positions to pretension the cage spring and my first attempt saw the obvious selection of the wring one with a droopy chain. So time to try the other position except I had no idea what was the first one I used nor was it easy to see what position everything clicked into place and this was definitely becoming JTJKP territory. Anyone who has dismantled a rear derailleur is basically a saddo with too much spare time but will know where comes a point in doing so known as “what the f***, everything just sprung apart”. The proceeds to the “how the hell do I put that altogether again phase” which with luck and a lot of JTJKG will turn into the “I’ll never do that again phase”. Unfortunately it seems the average bike nerd only remembers the first two phases for some sado-masochistic (SIC) reason. See the new derailluer below.
Luckily in this case the issue was resolved quickly and it was time for a test run. I was super keen to go try and climb the Montee Place Royale again but somehow the Spring weather on the Catovien Terrace and a cold Rose wine where a stronger temptation. What can I say post project. Well firstly, wow! It works. When I was tunging the shifting it was notably hard shift to the largest rear ring when in the large front ring. Was the chain too short????? No, the system was never designed for such mad cross chaining and its a miracle it even does the shift. It’s butter smooth shifting (well if Di2 Ultegra is butter smooth then the vintage Campy is a bit like butter artisinal de France, with distinct grains of salt to grind on to your delight). It works seriously better than I expected. Yes the gaps between the gears are there but this was always going to be the case and in a work pushing 2 x 13 now, a serious dose on what actually works. A super fun project with a great outcome.

Leave a comment